
How to shoot like a professional photographer with your iphone
Spruce up your feed with
these simple techniques
From: Stephanie McEvoy
1. Composition
One of the top things most budding photographers struggle with is composition. Google it, and you’ll find all kinds of stuff about leading lines, diagonals, perspective, and even the Fibonacci spiral. But one basic rule of composition will instantly improve your images. The Rule of Thirds. Use your camera’s grid to place your object of interest on one of the crosshairs instead of in the center. This allows your subject to stand out from negative space and draw the viewer’s eye where you want it.
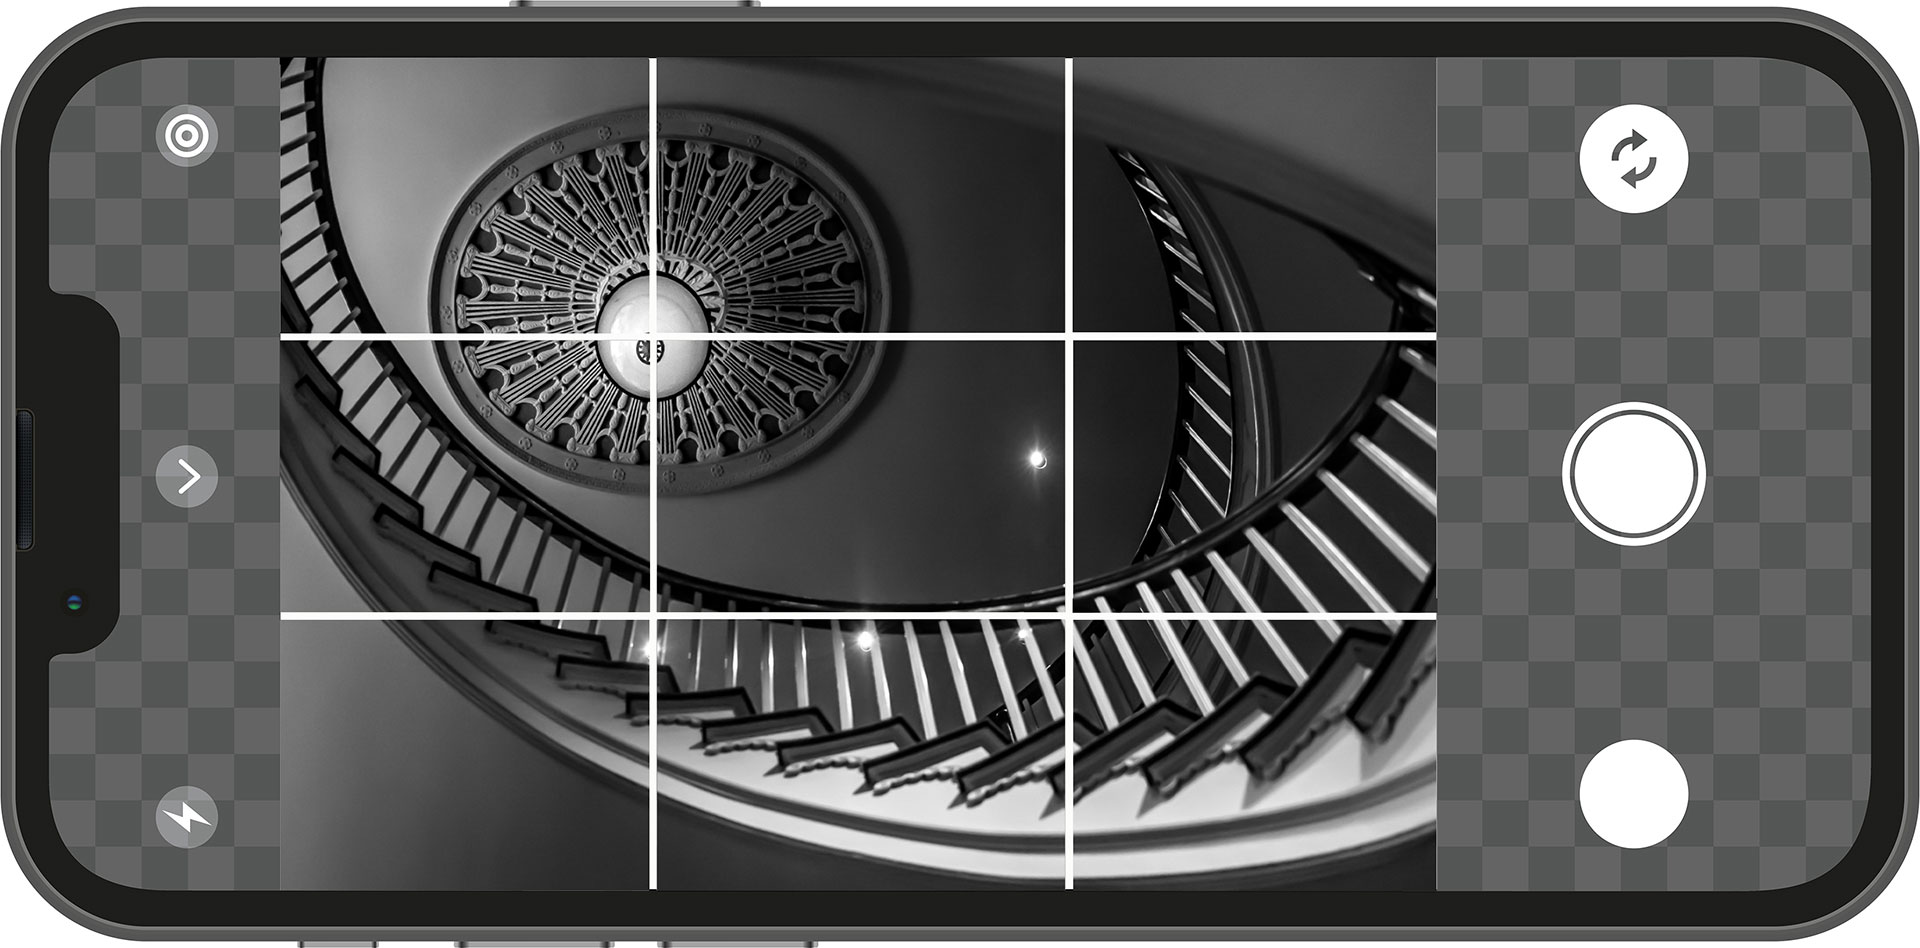
Good composition creates balance and movement within the image. It helps tell a story and provides direction for the viewer’s eyes.
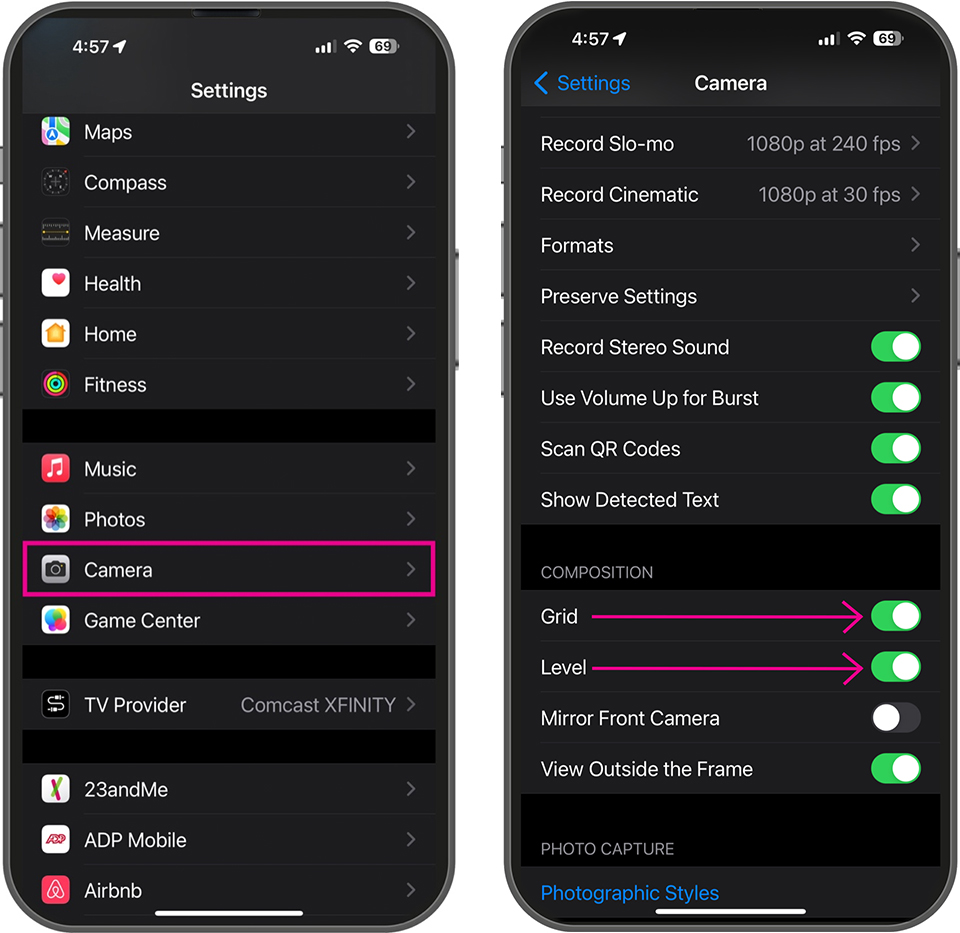
To turn on your grid, go to Settings Camera, turn on the grid. While you’re there, turn on the Level as well.
2. straighten your horizon
A major tell of a bad photo is a landscape that seems to be falling off the page. Using the grid and level you’ve just enabled will help you straighten it and keep the horizon out of the center. It should sit somewhere around the top one-third or the bottom, depending on what you want to give more attention to. If you forgot to straighten the horizon, you can always make a quick edit within the crop tool.

3. top down shots
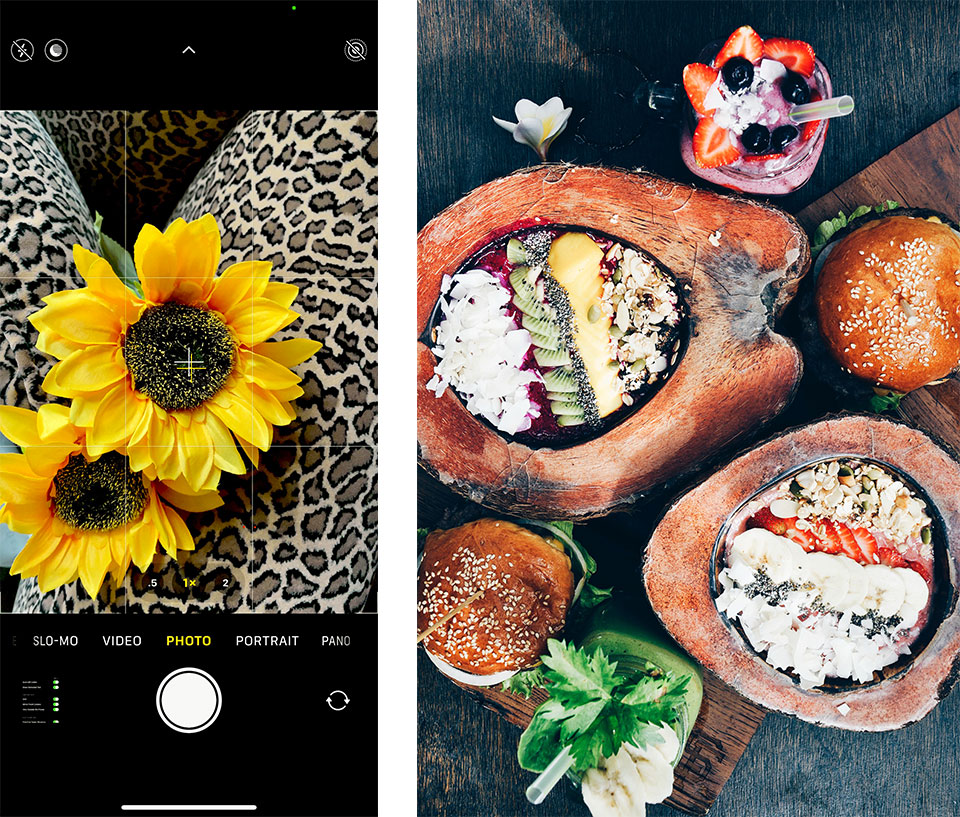
This style of imagery is very popular on Instagram, especially in food photography. But you want to avoid any off-center angles, which will distort your image. Now that the level is enabled, two crosshairs (one yellow and one white) will also appear when you point the camera straight up or straight down. Adjust the camera until the crosshairs are lined up, and then take the shot.
4. burst mode
Burst mode is an exciting feature that is great for photographing sports, birds, kids, or when you’re on the move trying to catch something fantastic. iPhones can take up to 10 shots per second. Be careful you don’t accidentally fill up your storage, though. We got over 200 images in just a few seconds before releasing the button!
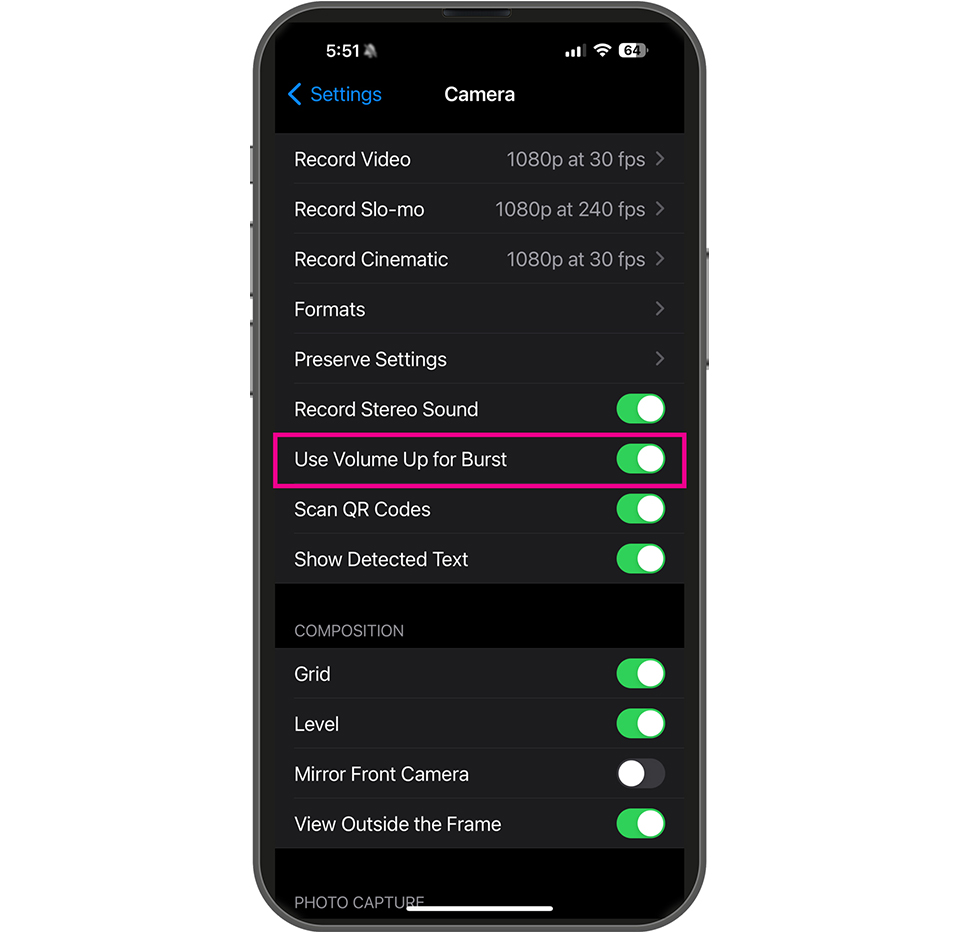
There are two ways to shoot in burst mode. One is to swipe and hold the shutter button to the left. You’ll see a counter of how many photos are being captured. To stop, release the shutter. Bursts will appear in a separate folder under Media Types. The second option to shoot in this mode is to press and hold the volume up button. To activate this feature, click Settings Camera Use Volume Up for Burst.
5. Turn your camera upside down
If you’re anything like us, you probably like to photograph cocktails when you’re out. Turning your phone upside down so that the camera lens is closest to the table gets you closer to the glass itself, so you get all the details.

6. Change the aspect ratio
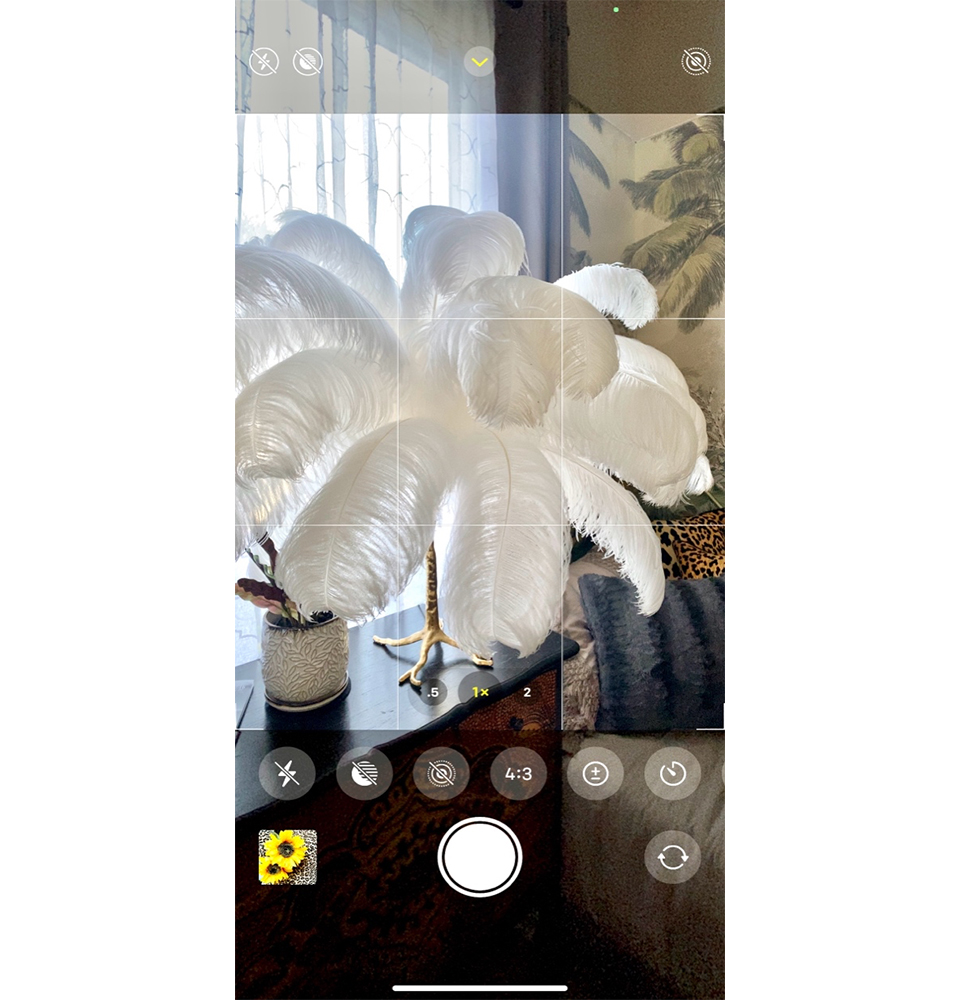
iPhone’s standard setting for aspect ratio is 4:3, but depending on your intended use, you may want to change that. For example, if you’re shooting specifically for Instagram, you may want a 1:1 ratio (square) to minimize unwanted cropping by the app. To do this, open the camera and click on the arrow at the top. This opens a menu at the bottom (flash, night mode, live mode, aspect ratio, exposure, self-timer). Click 4:3, and a new menu with different ratios pops up.
7. Exposure Slider
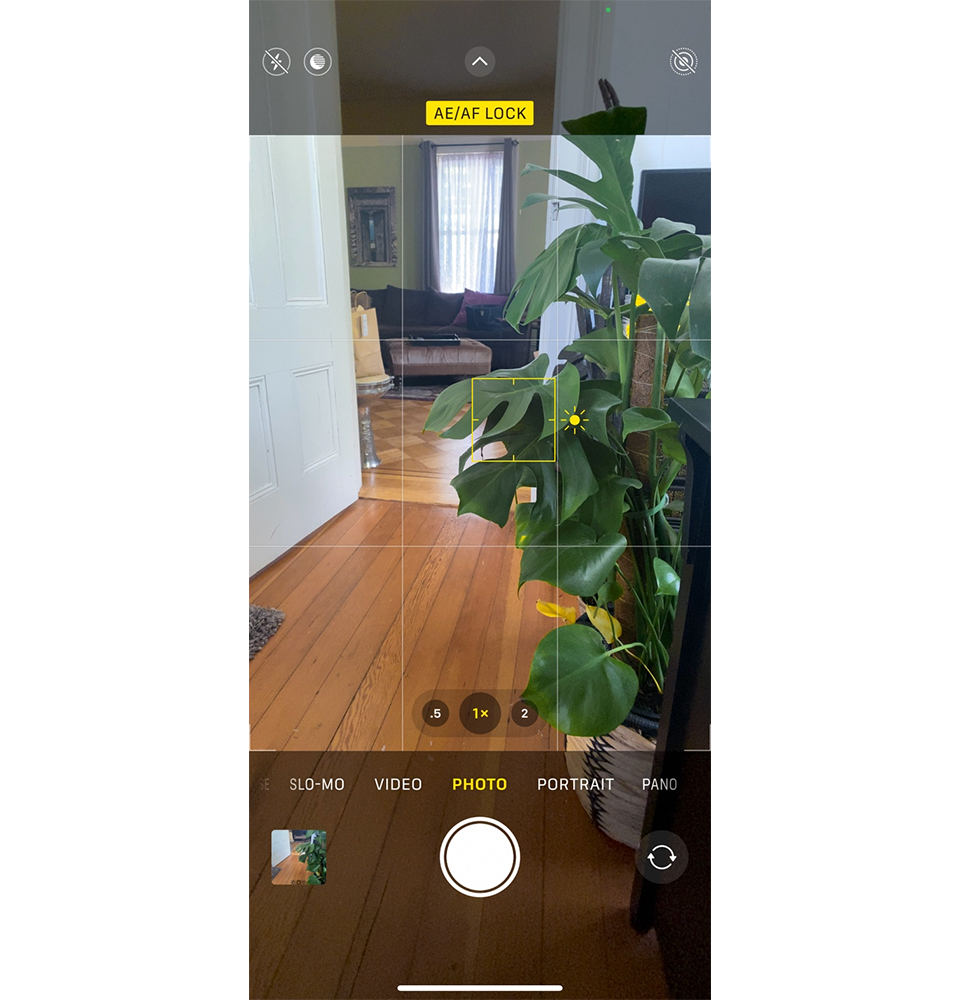
If what you’re seeing on your phone looks too dark or too light, you can adjust the exposure before taking the photo. Touch the screen on your subject, and it locks the focus. A yellow square with a sun graphic also appears. You can now use your finger to move the sun up or down and make the adjustments you want.
There are many more ways to take your iPhone photography up a notch, but these tips will help your images look more professional from the start. Have fun and happy shooting!


