There are various changes to make to WordPress to ensure your website looks and feels great.
Header and Logo Customizations
Header and Logo Customizations
In your WordPress dashboard, go to Appearance > Customize. This takes you to a WordPress customization section. Here you can upload your logo and change some very basic parameters of the header.
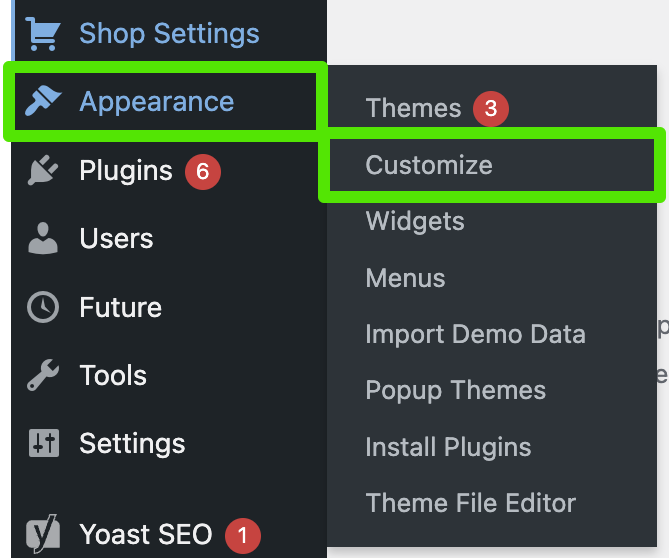
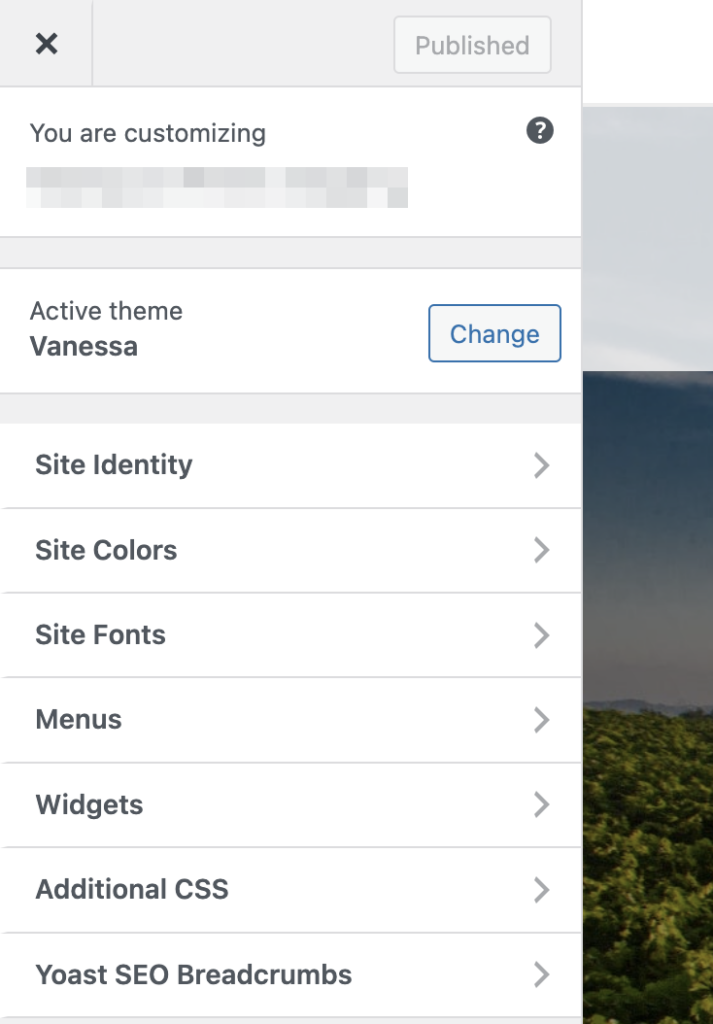
Part of the Header is also the menu, but to edit the menu you would go to Appearance > Menus. Here you can drag and drop different pages into the menu and depending on where you drop and position the menu items, you can make them main menu pages or submenu pages.
Footer Customizations
In WordPress, go to Appearance > Customize. This takes you to a WordPress structured section. Next you can go to the Widgets section. This will show you different footer sections to customize and change.
Use caution when editing the footer widgets, as if you make any subsequent changes, you have to ensure that all fields are filled in, otherwise they may become empty. This is a WordPress quirk in relation to using WP Engine and/or Elementor and can be frustrating and confusing if you aren’t prepared for this behavior.
WordPress Customizations
In this section, we’ll talk about WordPress customizations in the following areas:
Appearance Area
Pages Area
Plugins Area
See the details below:
Appearance Area
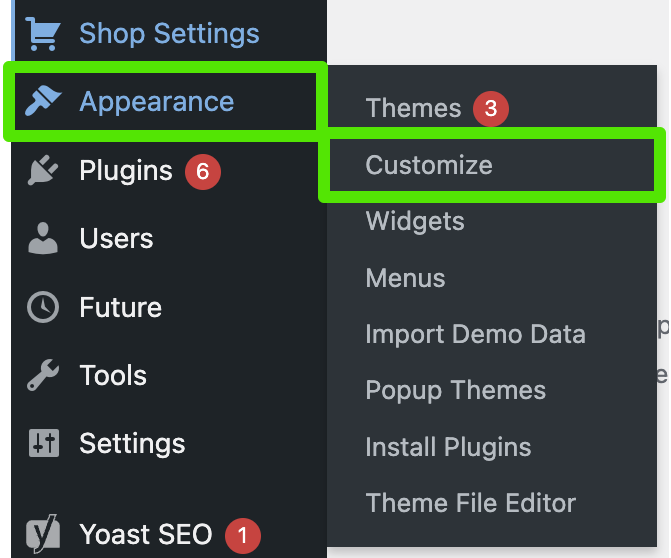
Go to Appearance > Customize:
Here you can see what Theme you have (Do not press the “Change” button).
Site Identity: This is where you can customize your website name and the logo that shows in the header.
Site Colors: Change the colors of your text, page backgrounds, link text, buttons, etc.
Site Fonts: You can customize the header and body fonts for the website. The fonts available here are Google fonts which are guaranteed to be safe for website use on almost any device. If you need to use custom fonts beyond what’s available here, you can obtain a free plugin called “Use Any Font”.
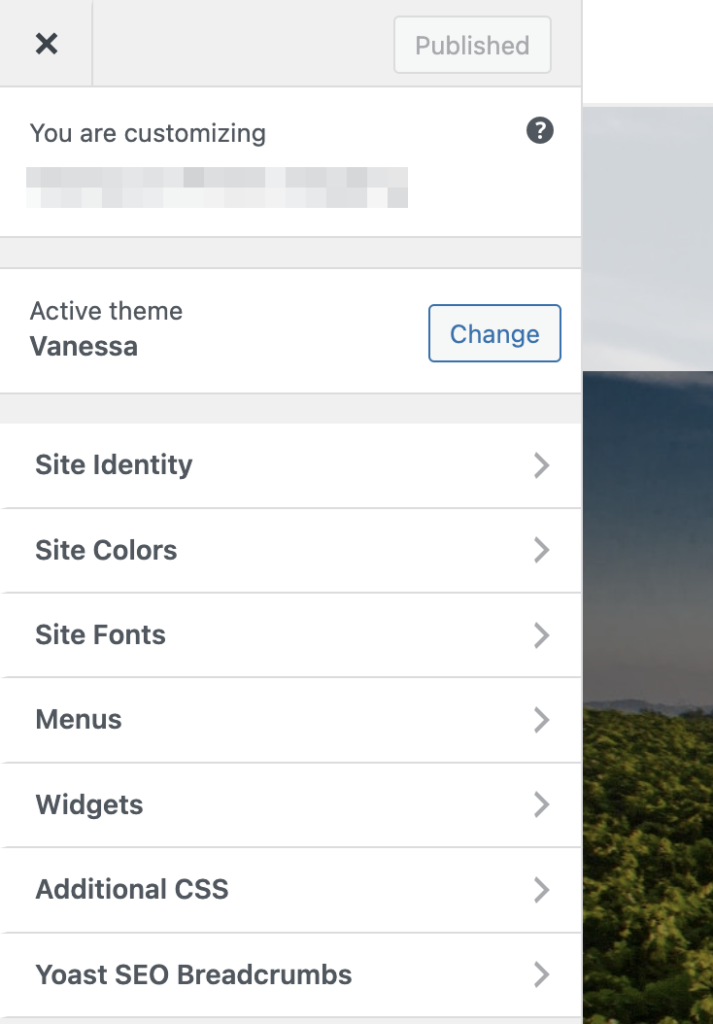
Widgets: This is where you’ll control what is displayed in the “Action Bar” if there is one in your menu. You can also go into the Footer options for Footer 1,2 and 3 and Footer Message.
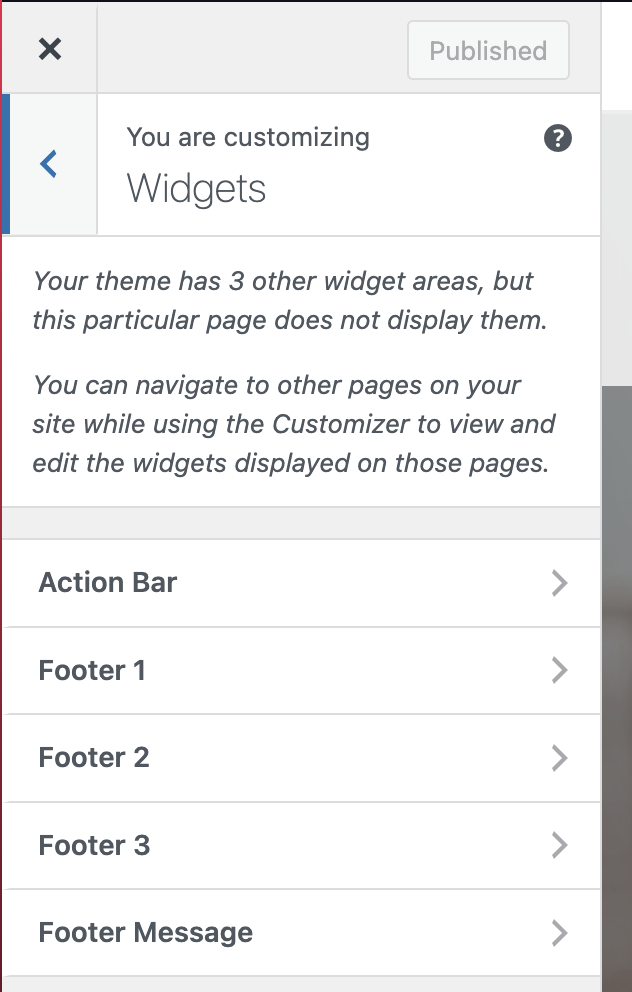
Be aware that in the footer section, due to a WordPress quirk, if you go in to edit it Footer 1 for example, the values that are already in there will often get removed.
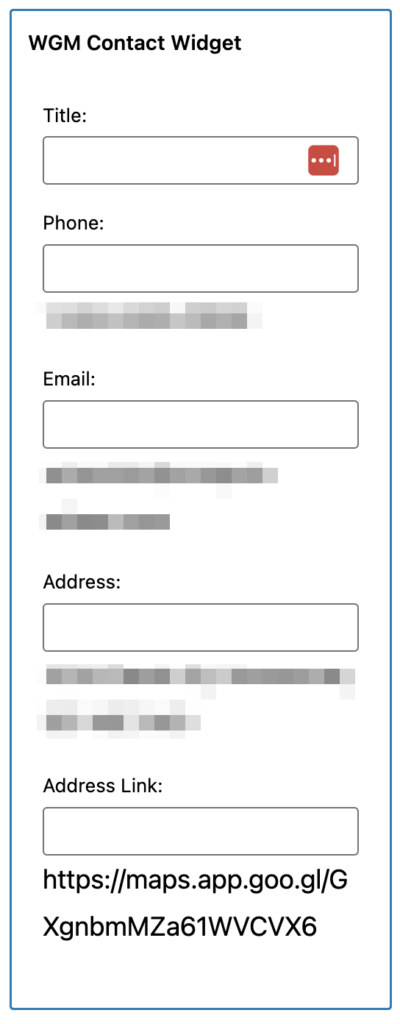
So if you are ever updating this area, you’ll want to make sure you don’t allow any fields to be left empty. In the below image, you will see that the Title, Phone, Email, Address and Address link fields are empty.
In this example, when you go in to edit the section, it will remove whatever existing values are present and display them below the content boxes as what was previous in there. You will need to copy and paste them back into the fields if you wish to retain what was there before.
PAges Area
The Pages section is where you will go to customize the pages of your WordPress site. When using one of our WordPress Universal Templates, you will be setup to use Elementor for most of your content editing.
The purposes of this documentation are to show you the specific behaviors unique to the Universal Templates that will be beneficial to you, but not the basics on how to use Elementor. There are many tutorials on how to use Elementor available. Some resources for that can be found here.
Depending on the eCommerce platform you are signed up with, there will be different store specific pages added to your full list of pages. These pages usually do not need to be changed or edited. They will also all be added on the same day when you activate the store connection.
Editing standard content pages you will be able to go to the page name, hover over it and choose “Edit with Elementor”. This will open up the Elementor editor and you can then begin making whatever customization choices you want. You are given a great deal of flexibility.
Plugins Area
This area will have already had the recommended and required plugins added when you went through the process of installing the theme (or if you had us install the theme for you, this would’ve happened for us when installing it).
However, there may be other plugins you wish to use or install. Use caution when adding plugins as some plugins may require updates or may expose your sites to security vulnerabilities. Ensure that any plugins you install are safe to use and from recognized companies.
Commerce7 Customizations
The pages that get added when using the Commerce7 eCommerce platform integration are:
Cart
Checkout
Club
Collection
Product
Profile
Reservation
These pages are automatically setup and don’t need to be edited or customized except for some possible CSS changes that may need required for a cleaner look and feel.
Cart and Checkout may need some CSS changes to ensure it looks as good as possible. Depending on your template, the CSS changes could be different.
Club page will automatically pull all data from the Commerce7 main club list. Additional CSS changes may be required to change the appearance of the look and feel.
Collection page is just a primary routing page and needs no customization or changes.
Product page is a default page that can be customized to pull data from Commerce7.
With both Club and Product pages, you have a choice in how you pull data from Commerce7.
Option 1: Pull the data raw from the various Commerce7 Collections or the Club List
Option 2: Insert a string of code into the page that pulls from a specific Collection or Club
Commerce7 has more information for web developers on how to make these kinds of changes.
Profile page is an automated page where a club member or customer can see their own online profile. No customizations are needed here.
Reservation page will display the reservations available. Customizations can be made here similar to the Club and Product pages as desired.
WineDirect Customizations
More information coming soon.
Complete DTC Customizations
More information coming soon.


